安装 Git
安装一路 Next 就行。
注册 GitHub
注意:在接下来的步骤中,<username> 表示用户名,<email> 表示注册时使用的电子邮件。
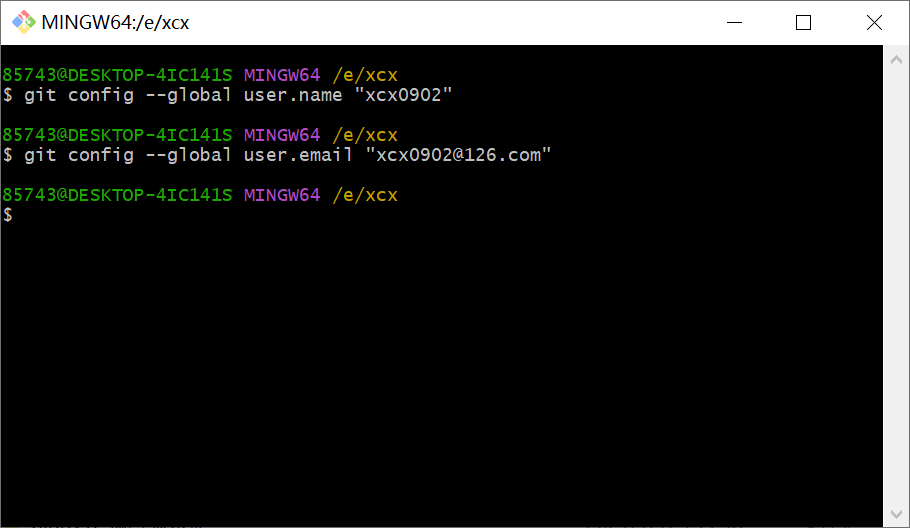
配置 Git
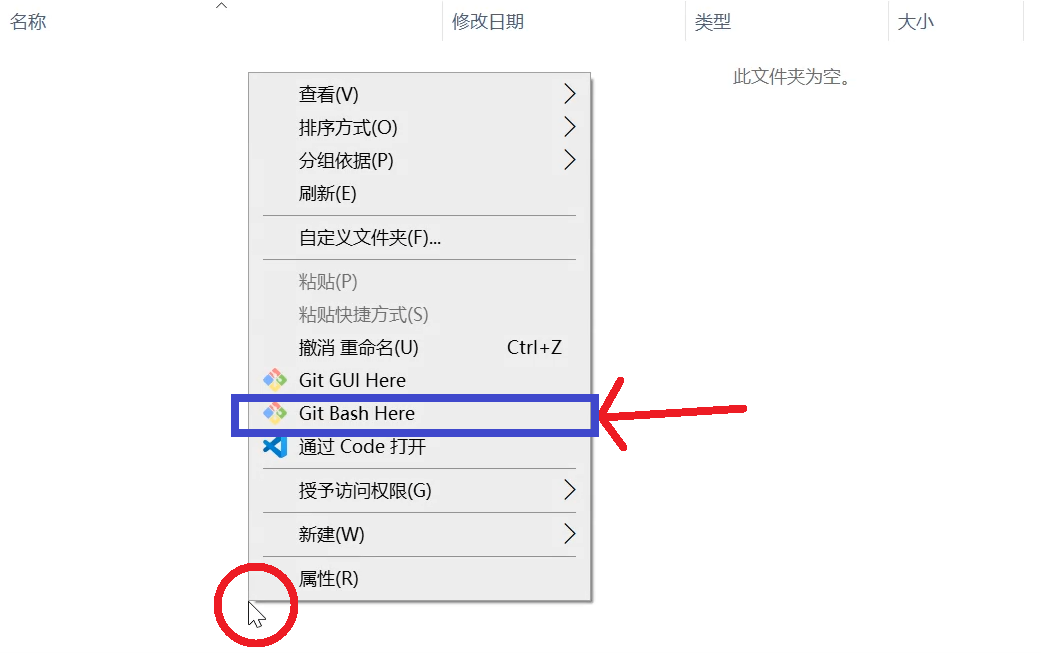
新建一个文件夹,例如 git-study。
在这个文件夹中,右键点击,找到 Git Bash Here,单击打开。
在命令行里输入:
1 | git config --global user.name "<username>" |
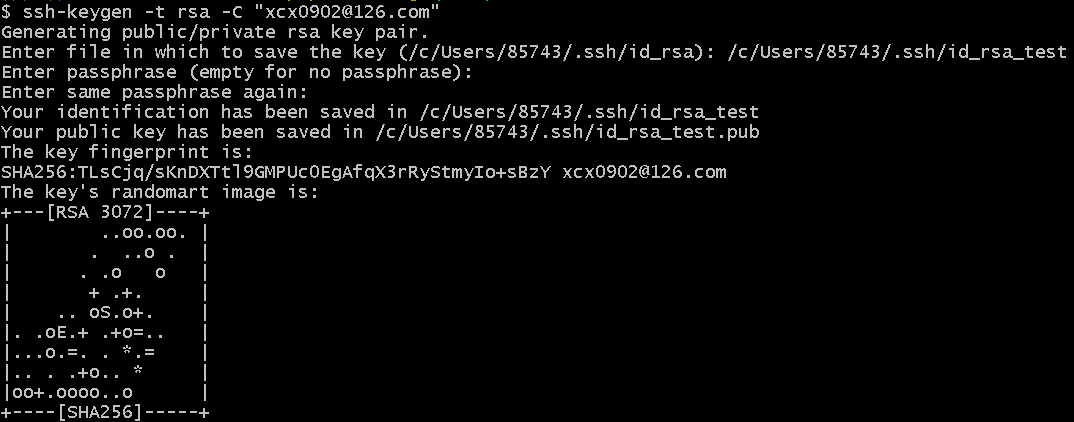
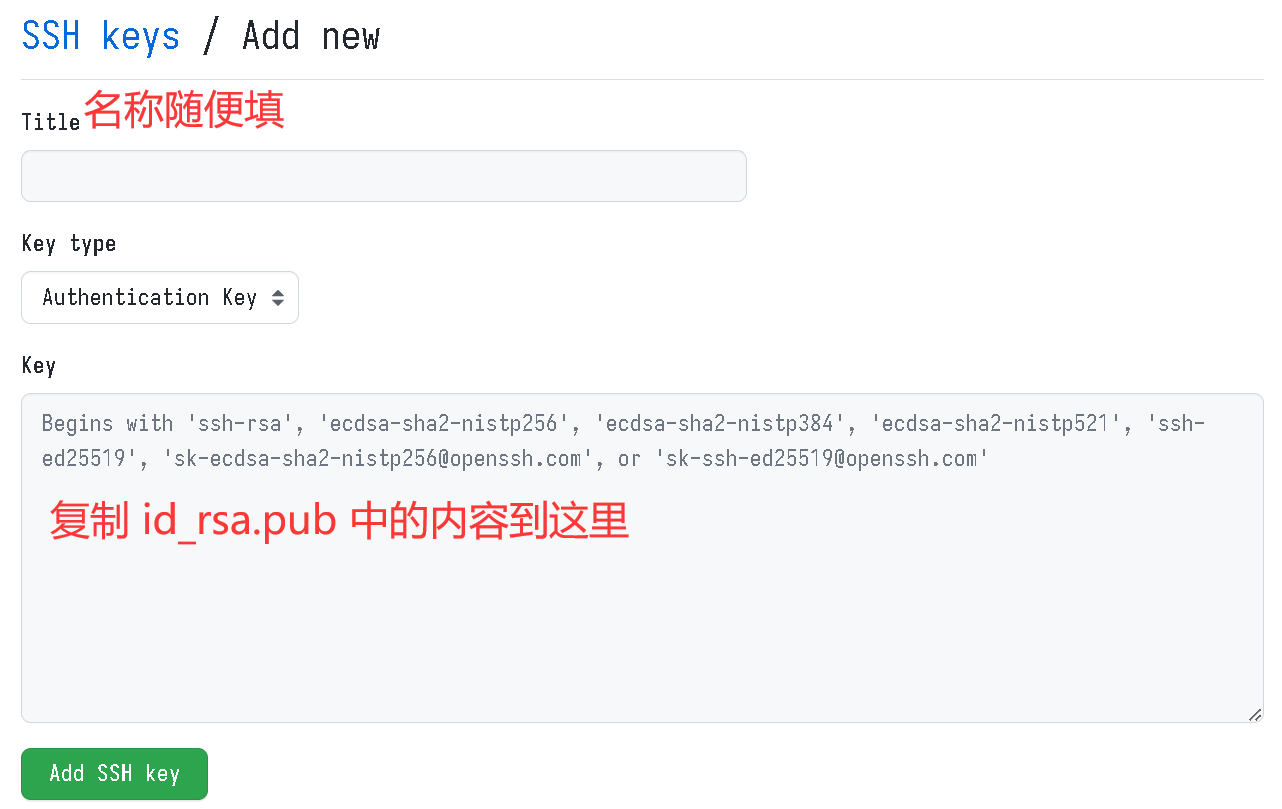
创建 GitHub SSH Key
参见这篇文章。
Try to use Git!
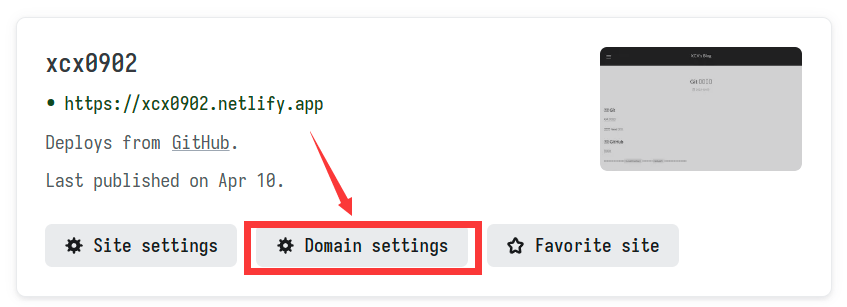
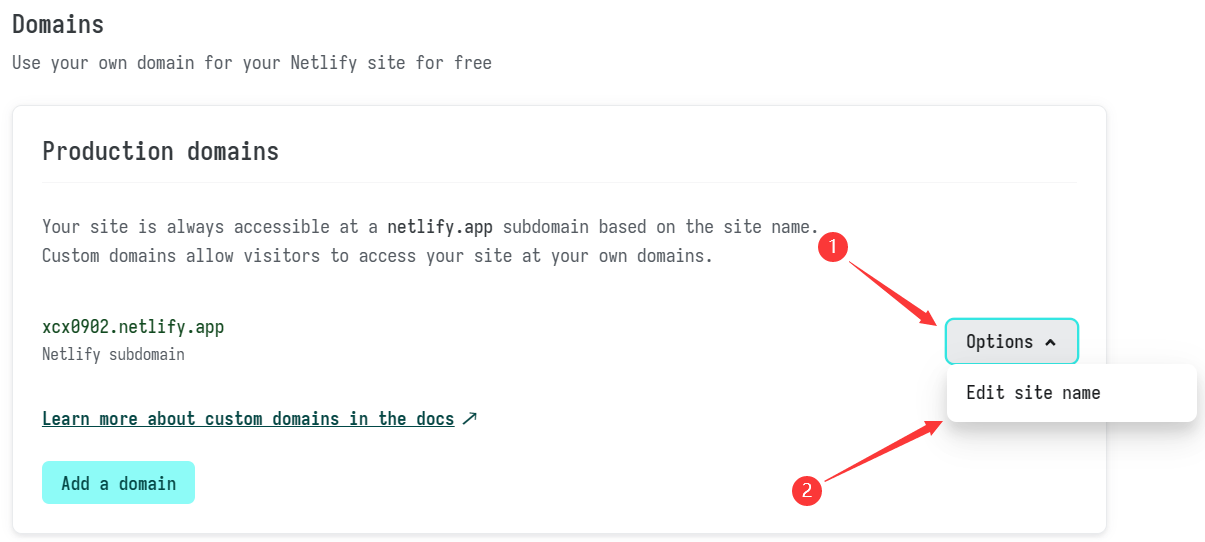
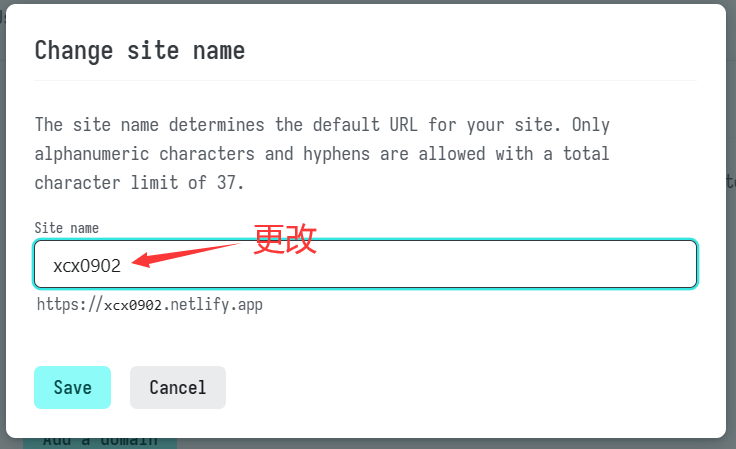
创建代码仓库
在 GitHub 上新建一个代码仓库(repository)。
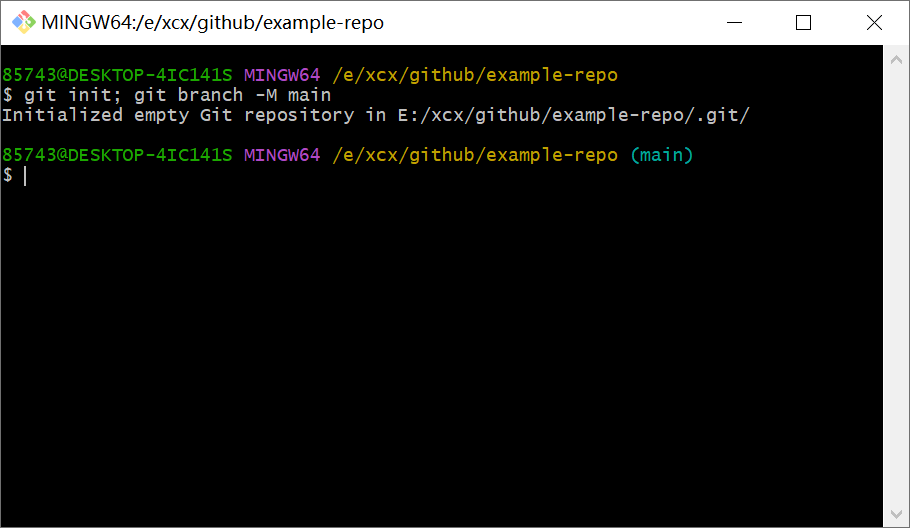
在本地新建一个空仓库
打开 Git Bash,输入 git init; git branch -M main。
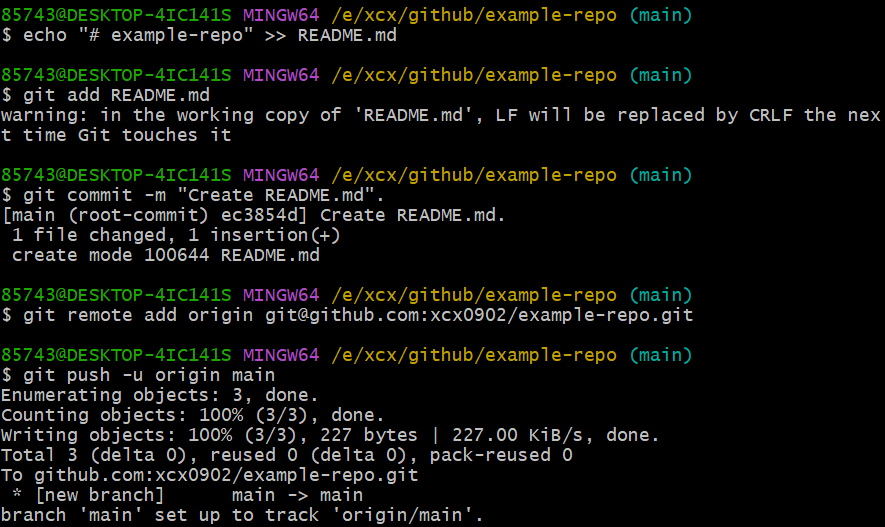
编写一些文件(如 README.md),并 Push 到 GitHub 原仓库
编写 README
1 | echo "# example-repo" >> README.md |
Commit
1 | git add README.md |
Setup remote repository
1 | git remote add origin git@github.com:xcx0902/example-repo.git |
Push to remote repository
1 | git push -u origin main |
Overall
1 | echo "# example-repo" >> README.md |